So I start to get a little bit boring just doing the unity thing and I want to test my little game on my iPhone so I just paid the USD400 to buy the IOS license and now i am trying very hard to follow the tutorial below
http://wiki.unity3d.com/index.php?title=IPhone_Getting_Started_with_the_UnityRemote
It is very very very hard indeed and hopefully I can get it done
after 5 minutes of following the instruction
it said
you need to pay $99 to enroll in iPhone Developer Program to use unity remote
oh my god
need more money
well, i guess since I already walk so far, I need to pay again
ok, after paying USD99 for the iPhone developer program
I need to setup the certificate, which is super hard for me, anyway, below is the video how to do it
http://www.youtube.com/watch?v=HlRI30F6-Ek
and after 2 hour of trial and error following the tutorial i finally able to see the unity game on my iPhone
but
.
.
.
.
.
..
.
.
.
.
.
.
.
.
.
.
IT IS SO BLURRY on my iPhone!!!!!!!!
and it appear it will always be like that meaning you still need to do a proper install
after USD500 gone and this is what i got....ahhhhh, just not what i expected
Sunday, November 25, 2012
today progress: Character can now enter 3 different building
So I have created 3 building and the character can run into it
Friday, November 23, 2012
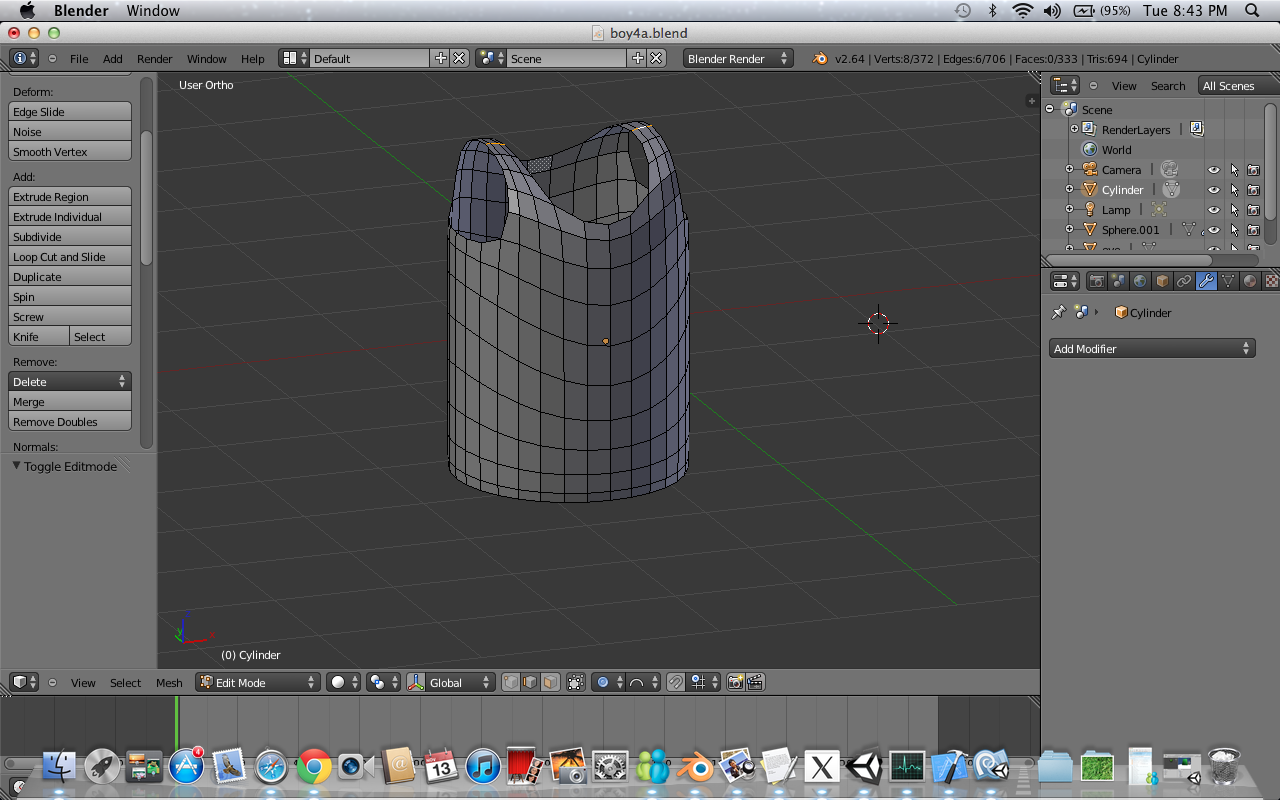
Today Progress: Changing cloth for my character
So this is the first attempt to change cloth for my character as in the video
As you can see, i try to make 3 button, shirt, pants, hair,
when i click shirt, i got 5 option to change the shirt
when i click pants, i got another 5 option to change the pants
for the noob that wondering how I accomplish this, below is the stuff that i used
1. OnGui function
- write a new script with OnGui function then add 3 button to the screen, then when pressing any of the button, show a new selectionGrid with 5 item , then you can drag 5 different texture into your selection grid
- when clicking the item on the grid, just change the texture of your character body
-below is sample code
2. Blender UV mapping
- when you create your character on blender, you need to create UV mapping for your character
- you need to mark Seem on your character manually, then select the body part to unwrap it
- you can then export you uvmapping to .png file and draw your shirt or pants on it
any question feel free to ask
As you can see, i try to make 3 button, shirt, pants, hair,
when i click shirt, i got 5 option to change the shirt
when i click pants, i got another 5 option to change the pants
for the noob that wondering how I accomplish this, below is the stuff that i used
1. OnGui function
- write a new script with OnGui function then add 3 button to the screen, then when pressing any of the button, show a new selectionGrid with 5 item , then you can drag 5 different texture into your selection grid
- when clicking the item on the grid, just change the texture of your character body
-below is sample code
GridValue = GUI.SelectionGrid(Rect(200,200,400,400),GridValue, ShirtGrids, 5); mySkinnedMeshRenderer.materials[8].mainTexture=ShirtGrids[GridValue];
2. Blender UV mapping
- when you create your character on blender, you need to create UV mapping for your character
- you need to mark Seem on your character manually, then select the body part to unwrap it
- you can then export you uvmapping to .png file and draw your shirt or pants on it
any question feel free to ask
Tuesday, November 20, 2012
Unity how to change texture for Skinned Mesh Renderer using script
Let say you have a character object that have 5 material on it, below is how you can change all the 5 material color using script
1. Create a new javascript
2. Paste in below code
var mySkinnedMeshRenderer: SkinnedMeshRenderer;
var texture1: Texture;
function Start () {
mySkinnedMeshRenderer.materials[0].mainTexture=texture1;
mySkinnedMeshRenderer.materials[1].mainTexture=texture1;
mySkinnedMeshRenderer.materials[2].mainTexture=texture1;
mySkinnedMeshRenderer.materials[3].mainTexture=texture1;
mySkinnedMeshRenderer.materials[4].mainTexture=texture1;
}
3. Drag your code into your Character object
4. Click your Character object, you should see the script property have 2 variable, Drag anyone of the texture into variable texture1
5. Drag Your character object into variable mySkinnedMeshRenderer
Now if your character have 5 different part of Material you will see all of them turn into texture1
Hope this help
Sunday, November 18, 2012
Today Progress: character running into a building
So I figured to spend another 30 minute to put in the building that i have created and maybe open and closing door when the character running into the building
Today Progress: First animation in blender and Unity
So here is my first character animation in blender
and then i export it as .FBX file and then i run it inside unity
TADA!!!!!!!!
OH YEAH!!!!!!!!!!!!!
LITTLE BABY STEP PROGRESS!!!!!!
and then i export it as .FBX file and then i run it inside unity
OH YEAH!!!!!!!!!!!!!
LITTLE BABY STEP PROGRESS!!!!!!
Blender how to animate object
Below is the tutorial I am following
summary
1. Drag 3 screen , top view normal , middle view Timeline, bottom view DopeSheet
2. Click "record" on your Dopesheet
3. Click the first keyframe in your timeline and move your object to position A
4. Click the second keyframe on time 24 and move your object to position B
5. Click play button on the timeline you can see your object move from A to B
Saturday, November 17, 2012
Blender how to weight paint inside vertex or face for noob
Here is what you should do
while in the "WEIGHT PAINTING" mode, press "ALT B" and select part of your character then you can paint it inside
see screen below

this is part of the finger, while I press "ALT B" then select half of the finger then you can see there are still some blue color inside the finger, then I can paint it red so the WEIGHT PAINT is correct
Friday, November 16, 2012
today progress, completing the body part
After following all the tutorial I manage to finish my body part , yes

put in the head


put in the head

Blender creating amateur tutorial
Below is the tutorial I am following
Summary
1. Create an Amateur bone
2. In the bone property , tick X-RAY so you can see it inside the body
3. On edit mode, press the tip of the bone and press E to extrude a bone for the monkey head
4. On edit mode, press the tip of the bone, tick the "X-mirror" on left hand side and "SHIFT-E' to extrude two arm bone for the monkey
5. select the arm bone , press "ALT-P" to disconnect it from the parent, drag it to the arm
6. To do the leg, "SHITF-E" to extrude then 'ALT-P' to disconnect , 'G' to move it to the leg , 'R' to rotate, 'S' to resize
7. make sure all bone "ROLL " set to zero
8. on POSE MODE, add BONE constraint -> inverse kinematic-> chain length 2 to both lower leg and lower arm
9. on object mode, select your monkey mesh, APPLY-> ROTATION AND SCALE
10. Finally , "SHIFT select MESH and AMATEUR" then "CONTROL P" set to automatic weight
Tuesday, November 13, 2012
Today Progress : Building a body part
First step as screen shot below

Second step is to extrude the arm and neck and below is the result


Second step is to extrude the arm and neck and below is the result

Now to put back the head

And just in case you are wondering where do I find the tutorial to do this?
below is the link that I learn the tutorial from
Monday, November 12, 2012
Today Progress, creating a character face
Man I suck at blender, here is my 4th attempt to create a character face

so freaking ugly, but i have limited skill


so freaking ugly, but i have limited skill

Here is after another 5 minute of tweaking to make it cooler
Blender how to select multiple edge or vertices at the same time
Here is how to select multiple edge or vertices at the same time on blender
The most easy way is to press 'B' then you can draw a rectangle to select all within that rectangle
or you can SHIFT-RIGHT click each of them one by one
The most easy way is to press 'B' then you can draw a rectangle to select all within that rectangle
or you can SHIFT-RIGHT click each of them one by one
Today Progress, Create my first furniture house in Blender
So I have taken all that I have learned and created my first furniture house in blender

To help out the noob out there below is the shortcut key i Used
1. Press 'TAB' for edit mode
2. press 'G' to grab then press 'X', 'Y', or 'Z' to move in certain direction
5. press 'TAB' for edit mode, then press 'K' to cut certain line, press space bar to confirm
6. press 'E' to extrude certain part
7. press ALT-CTL-Q to switch between 4 view and 1 view
8. Add few material and assign different material to different face of the object to color them
hope that help

To help out the noob out there below is the shortcut key i Used
1. Press 'TAB' for edit mode
2. press 'G' to grab then press 'X', 'Y', or 'Z' to move in certain direction
3. press 'S' to scale then press 'X', 'Y', or 'Z' to scale in certain direction
4. press 'R' to rotate then press 'X', 'Y', or 'Z' to rotate in certain direction
5. press 'TAB' for edit mode, then press 'K' to cut certain line, press space bar to confirm
6. press 'E' to extrude certain part
7. press ALT-CTL-Q to switch between 4 view and 1 view
8. Add few material and assign different material to different face of the object to color them
hope that help
Blender how to create 3D text
Below is the tutorial I am following on how to create 3D text using blender
Summary
1. Open Blender, Add -> Text
2. Object Modifier-> Add Modifier -> Solidify (Set to any thickness you want)
3. Press Tab to go to edit mode and type any word you want
4. To change color, Material -> add new Material -> Diffuse (change to any color you like)
Summary
1. Open Blender, Add -> Text
2. Object Modifier-> Add Modifier -> Solidify (Set to any thickness you want)
3. Press Tab to go to edit mode and type any word you want
4. To change color, Material -> add new Material -> Diffuse (change to any color you like)
Saturday, November 10, 2012
Blender How to create a house
Below is the tutorial I am following on how to create a house using blender
Summary
1. Open a new blender project, Scale your Cube so that it is big and flat
2. On edit mode, select the top face of the cube and press 'X' to delete the face
3. On edit mode, select the bottom face of the cube and press 'P' to separate it from the others, name it "FLOOR"
4. On edit mode, select the "FLOOR" and subdivide it multiple time, now you have 100 box
5. On edit mode, you can select a few box out of 100 box to make your wall, press 'E' to bring it up to become wall
Unity How to create terrain
Well, again, someone already doing some very awesome video, so I just share the link of the tutorial
Summary
1. Create a new terrain , then set resolution smaller maybe 100, 100, 100
2. Under the Terrain Script -> Paint Terrain Texture -> Edit Texture -> choose your texture file
3. Raise terrain height
Summary
1. Create a new terrain , then set resolution smaller maybe 100, 100, 100
2. Under the Terrain Script -> Paint Terrain Texture -> Edit Texture -> choose your texture file
3. Raise terrain height
Unity How to Create Main Menu
Well, I am not going to write tutorial as others have done it so well
below is the best tutorial i found on the net
http://active.tutsplus.com/tutorials/unity/getting-started-with-unity-finishing-our-game-with-a-menu/
summary
1. Create 2 scene, example "MainMenu", "Level1", open build setting and drag them in, make sure main menu scene on top
2. Game Object -> Create Other -> 3D Text, name it "PlayButton"
3. Create a java script, paste in this code, and drag it to your 3D text(PlayButton)
function OnMouseDown()
{
// if we clicked the play button
if (this.name == "PlayButton")
{
// load the game
Application.LoadLevel("Level1");
}
}
4. Click play and when you click the PlayButton it load level 1
Friday, November 9, 2012
Today Progress
So today I am going to build a character from scratch and then add in some bone then export it into unity
and below is the result

as you can see, i create a sphere, then i extrude the body, then i extrude both arm, then i add in some bone and attach it to the mesh, now i can move the character freely
I am lazy to do video so I only got one picture to show, sorry
and below is the result

as you can see, i create a sphere, then i extrude the body, then i extrude both arm, then i add in some bone and attach it to the mesh, now i can move the character freely
I am lazy to do video so I only got one picture to show, sorry
Blender how to reduce polygon for noob
Here is how you can reduce polygon on Blender
1. select your object
2. On the right hand side, find Object Modifier -> Add Modifier -> Decimate
3. Then just put 0.5 to reduce 50% of your polygon
If you got error "Non-manifold mesh as input"
Here is how you fix it
1. Select the model, press "TAB" to enter edit mode and choose the menu option Select -> Non-Manifold
2. On Object Modifier -> Add Modifier -> Add Edge Split Modifier, set the edge angle to 90 degree then press apply
3. You will have 10% chance to fix it this way
But 90% chance you won't fix it,
So what is the next step?
You need to get Meshlab on the link below
http://meshlab.sourceforge.net/
It is a free open source software
STEP
1. Download Meshlab
2. Open Meshlab, import your .obj Mesh
3. Filters -> Remeshing, simplification and reconstruction -> Quadric Edge Collapse Decimation
Tuesday, November 6, 2012
Unity Character moving in a wrong direction quick fix for noob
Ok, So today I face another problem where the character is moving sideway when I want him to move forward, no matter how i rotate the character it still move sideway
solution
1. Create an Sphere
2. Add character controller to the sphere
3. Make sure you can control the sphere nicely
4. Drag your character into the sphere (become his child)
5. Rotate your character
Now it will work, your character now can move forward when you want him to move forward
hope it help
Unity Character sink through floor quick fix
Today I faced one of the weird problem where after I place a character controller on my character and putting in walking script it sink through the floor
Anyway
Here is a quick solution
Please notice that under your Character Controller property there are
Radius: 0.5
Height: 2
I found that if you just change the Height from 2 to 1, your character won't fall anymore, I dunno why, if any pro out there can understand please explain to me, but it will fix the problem anyway
Monday, November 5, 2012
One of the best unity tutorial I am following
Below is several of the best unity/blender tutorial I am following
Just to bookmark the link
http://www.youtube.com/user/theslayer29179
http://www.youtube.com/user/cgboorman
http://www.youtube.com/user/TornadoTwins
they are all very awesome
Just to bookmark the link
http://www.youtube.com/user/theslayer29179
http://www.youtube.com/user/cgboorman
http://www.youtube.com/user/TornadoTwins
they are all very awesome
Sunday, November 4, 2012
Blender how to move a point across Axis Lock
Let say you want to move a point in your game object only along X, Y or Z
this is how you do it
1. First, select the point by right clicking it
2. PRESS "G" to grab
3. PRESS "X" then you can move it along x axis, PRESS "Y" then you move it along y axis, and PRESS "Z" then you can move it along z axis
hope that help
this is how you do it
1. First, select the point by right clicking it
2. PRESS "G" to grab
3. PRESS "X" then you can move it along x axis, PRESS "Y" then you move it along y axis, and PRESS "Z" then you can move it along z axis
hope that help
Blender how to assign different color to different face
Step by step Blender how to assign different color to different face
1. Press "TAB" to go into edit mode
2. Make sure on bottom you choose "FACE SELECT"
3. Right click on one of your face in your cube
4. On right hand panel click "Material", add a few new material, set the "diffuse " to red for material 1, blue for material 2, green for material 3 example
5. Now you can click material 2 to set your face to blue, while other face remain red
hope that help
Blender how to cut a hole in your object
Here is a tutorial I study from the youtube
The summary
1. Press "tab" to go into edit mode, press "A" to select all
2. On left panel, choose "subdivide" , cut it 4 or 6
3. Choose the middle part, press x to delete its vertical, now you have a hole in your cube
4. To make a circle hole, you need to first select the edge of your hole, click "MESH" on bottom then MESH -> SNAP -> CURSOR TO SELECTED
5. Press OPTION+SHIFT+S (on IMAC) then you got your circle hole
Saturday, November 3, 2012
UV mapping on Blender
Below is the tutorial i study on youtube
To Summarize
1. Drag a second screen
2. On second screen, show UV editor
3. On first screen, press "A" to select all, then press "U" to unwrap your cube to the UV map
4. On second screen, press "A" to select all, press "R" to rotate, press "S" to scale
5. On second screen bottom, press UVs -> Export UV layout -> Export to your desktop cube01.png
6. Open cube01.png using your paint brush or gimp, put in color and number
7. On first screen, on top right , on the texture, type -> Image or Video, then open cube01.png
8. Under mapping -> coordinate -> choose UV
9. Render and see now it map perfectly on your cube
10. On first screen, press "N" for property, under display -> Shading -> change to DLSL, then tick on the "TEXTURE SOLID" (make sure second screen you choose your cube01.png)
11. now you can see your pic on your cube without rendering
Friday, November 2, 2012
Unity how to change texture for game object using script
Here is the easy way
var myTexture : Texture;
gameObject.renderer.material.mainTexture= myTexture;
step by step how to do it in scrip
1. Create a new java script on your Unity
2. Paste in the code
3. Drag your script into one of your gameObject
4. Drag the texture you like into your gameObject variable myTexture
var myTexture : Texture;
gameObject.renderer.material.mainTexture= myTexture;
step by step how to do it in scrip
1. Create a new java script on your Unity
2. Paste in the code
3. Drag your script into one of your gameObject
4. Drag the texture you like into your gameObject variable myTexture
Unity How to generate random number
Here is the easy way
var mynumber: int;
mynumber = Random.Range(1,4);
//this will random number from 1 to 3, if you put (2,5) it will random number from 2 to 4
var mynumber: int;
mynumber = Random.Range(1,4);
//this will random number from 1 to 3, if you put (2,5) it will random number from 2 to 4
Unity prefab instance disappear itself after a while
Here is the code, enjoy
var lifeTime =1.0;
function Awake()
{
Destroy(gameObject, lifeTime);
}
1. Create a new javascript, paste in the code
2. attach this script to your game object prefab(example fireball)
Unity Prefab for Noob
Prefab is something you can add into your scene using the script, such as fireball or bullet
Step to create and use the Unity Prefab
1. Open Unity, under Asset -> Create -> Prefab
2. Drag your game object(fireball) into the new prefab you just created(under project tab)
3. Create a new Javascript
function Update()
Step to create and use the Unity Prefab
1. Open Unity, under Asset -> Create -> Prefab
2. Drag your game object(fireball) into the new prefab you just created(under project tab)
3. Create a new Javascript
var YourPrefab: Transform;
function Update()
{
if(Input.GetButtonDown("Jump"))
{
var bullit = Instantiate(YourPrefab, Vector3(x,y,z) , Quaternion.identity);
bullit.rigidbody.AddForce(transform.forward * 200);
}
}
4. Drag your javascript to your Main Character
5. Drag your fireball prefab into your Main Character variable "YourPrefab"
6. Select your prefab, Component -> physics -> rigid body
7. Click play, you should be able to shoot fireball with your main character
the script check if the button "spacebar" is press, then it will create a new prefab(your fireball) out of thin air at the location you specify and will move with the force of 200
Thursday, November 1, 2012
Error : Unknown identifier:'iTween' Solution for Noob
If you are using Unity and after you importing Itween and when you create a new simple javascript such as
If you get error
Error : Unknown identifier:'iTween'
first, please notice that your folder is ITWEEN -> PLUGIN -> itween.cs
So, first level = ITWEEN
move your PLUGIN folder to first level
so now your folder look like this
ITWEEN
so both ITWEEN folder and PLUGIN are on the same level , first level
this will work and your error will be gone
hope this help, please note i spend 2 hour for fixing this, so I will really appreciate if you can leave a comment to thank me, thanks
function Start ()
{
iTween.MoveTo(gameObject,{"y":5} );
}
If you get error
Error : Unknown identifier:'iTween'
here is the solution to fix this
first, please notice that your folder is ITWEEN -> PLUGIN -> itween.cs
So, first level = ITWEEN
second level = PLUGIN
move your PLUGIN folder to first level
so now your folder look like this
ITWEEN
PLUGIN -> itween.cs
so both ITWEEN folder and PLUGIN are on the same level , first level
this will work and your error will be gone
hope this help, please note i spend 2 hour for fixing this, so I will really appreciate if you can leave a comment to thank me, thanks
Starting iTween for Unity for Noob
Here is a step by step how to use iTween to animate all your object in Unity for Noob
1. Open Asset Store and download "iTween"
2. Open Unity, create new project and make sure you import "iTween" on the checkbox
3. GameObject->Create Other -> Plane, set x,y,z to 0,-0.5,0
4. GameObject->Create Other -> Cube, set x,y,z to 0, 0, 0
5. GameObject-> Create Other -> Point Light , set x, y, z to 0, 2, 0
6. Drag the RotateSample or MoveSample to your Cube(under iTween-> Sample on bottom middle)
7. Click play and see your rube now rotating non stop
Thats it, you can move your cube anyway you want, for other list of stuff you can do, just follow the documentation here
Subscribe to:
Posts (Atom)